Wednesday, June 11, 2014

Open Faced Plum Cake

PROJECT PATISSERIE: Adventure #15

One of the biggest injustices in the world, I think, is that sugar and butter aren’t diet foods.

My favorite quote on the subject comes from Jim Davis (for all those Dallas fans out there, he played the family patriarch Jock Ewing.) Mr. Davis said “It’s recommended that we eat at least three servings of vegetables a day. I suggest carrot cake, zucchini bread, and pumpkin pie.” If I ever get myself together and open a bakery, that quote will be prominently displayed somewhere on the premises. Pumpkin pie, indeed.

With bathing suit season upon us, this week is all about a healthier option (mind you, I didn’t say “healthy”, just “healthier.” )While I’m no nutritionist, I would think that a few dabs of butter (instead of 4 sticks of it) and fresh fruit (instead of sugary jam) are healthier options, but to paraphrase Albert Einstein, it’s all relative!

I had great plans of baking a beautiful Southern-style strawberry cake this weekend (yes, I’m still on my strawberry kick!) but unfortunately the weekend’s plans didn’t allow for two leisurely hours in the kitchen, so I turned to my tried-and-true open-faced plum cake recipe. The occasion was the pancake breakfast and a bake sale at the Methodist Church in Omar. In my mind, the bake sale was on Sunday morning and I knew that I would have time to bake on Saturday afternoon.

I’ve been making this open-faced plum cake for a few years now. It’s delicious, takes very little prep work, and is done in a New York minute! It also reminds me a bit of a Czech open faced cake called a Bublanina that uses fresh, pitted cherries, or blueberries in place of the plums.

So, Saturday afternoon comes around and I settle in to make the cake. I’m measuring out ingredients, pre-heating the oven, and slicing the plums, happy as a lark to be in the same kitchen with my Mama (she lives in Baltimore, so we don’t get to cook together all too often) when suddenly I look at the calendar. The church bake sale was happening on the morning of the 7th, that would be Saturday, the 7th of June- not Sunday. The bake sale was already over!  If my hands weren’t all juicy from the plums I was slicing I would have slapped myself on the forehead! I used to have an awesome memory- that is, before I had children. Something about having two little ones running around the house has wrecked my short term memory completely. “Baby Brain” strikes again!

Alas, the cake didn’t make it to the church bake sale as intended, but I guess being stuck with something delicious and homemade isn’t the worst thing that could happen- bathing suit season or not!

Open Faced Plum Cake

Preheat oven to 400 degrees Fahrenheit. Butter a 9 inch spring form pan or pie dish. Whisk together  1 ½ c. of flour, 2 tsp. baking powder, and ½ tsp. salt. In a separate bowl, combine ¾ c. sugar, ½ c. of whole milk, ¼ c. of vegetable oil, and 1 large egg.  Fold the wet mixture into the flour mixture and stir until evenly mixed. Pour the batter into the prepared dish and smooth the top.

This next part is open to artistic interpretation: the plums. I’ve made this cake with apricots as well. Although I’ve never tried it, I imagine that pitted peaches would be lovely, too. The recipe I used directs the chef to pit and halve six black plums and arrange them cut sides up over the batter, pressing them down into the batter lightly. I was feeling creative that day and instead of halving them, I cut each pitted half into quarters ad arranged them in a sun burst pattern. How the chef arranges the fruit doesn’t affect the baking time at all so feel free to let your culinary inspiration flow!


Combine ¼ tsp of cinnamon with 1 Tbsp. of sugar and sprinkle over the top of the batter, dot with a little bit of butter and bake until the cake is golden brown and passes the toothpick test- about 30 minutes or so. The cake is best the same day that it comes out of the oven, but it’s pretty good the next day, too- if it lasts that long!


Thursday, June 5, 2014

Ode to Joy: Strawberry-Lemon Cream Minis

PROJECT PATISSERIE: Adventure #14

My ode to summer continues this week with the mighty strawberry. Unlike rhubarb, I doubt I have to work very hard to sing its praises as the plethora of desserts featuring this delightful little berry are enough to speak to its overwhelming popularity.

The two headlining features in this week’s dessert are strawberries and lemon. While perhaps a less obvious combination than strawberries and rhubarb, they do work well together, as evidenced by the ubiquitous summertime drink, strawberry lemonade. In fact, if strawberry lemonade ever wanted to make a foray into the dessert realm, I am confident that this would be its first incarnation.

There seems to be a large contingent of Americans who are not fans of citrus desserts. I encourage the folks out there who dismissed this dessert at the “lemon” part to please give it a try (or encourage the baker in their life to give it a try and they can taste the spoils!) I say this with the utmost confidence because I am of the same proclivity: I love lemons and all manner of citrus in every possible way except in my pastry. But this dessert is different.

My brother Tom, who has always had a sweet tooth, moved to Charleston, South Carolina some years back. He said that his first summer there, with the intense heat and high humidity, almost killed him. Eventually he adjusted to the summer weather, but in the years since, he’s given up the majority of his sweets, finding that in the oppressive heat the last thing he wants to eat is sugar.

Tom and his stories of the Southern summers were in the back of my mind as I read through this recipe, particularly as it came from a southern-themed magazine where the editors pegged it as “refreshing.” With the sort of summers the South experiences, that’s saying something, but those editors weren’t kidding. The lemon makes this the first truly refreshing non-frozen dessert I think I’ve ever had. I’ll be sure to revisit this recipe in July when the North Country experiences our two weeks of unbearable heat!

These little guys present pretty well and are sure to entice lots of “ohhh”-ing and “awww”-ing from friends and family. Don’t be intimidated by the length of the recipe, as it actually goes rather quickly.

Miniature Strawberry-Lemon Cream Tart

Pre-heat the oven to 425 degrees Fahrenheit. Roll out two pie crusts into two 12 inch circles on a work surface dusted with a bit of powdered sugar. Stamp out twelve,  6 inch circles. Fit the rounds, sugar side down, into some kind of miniature, oven-proof vessel. The recipe suggests miniature pie pans.  I experimented with a variety of things- including miniature tart rings, a miniature spring form pan, and individual ramekins. While I found that the tart pans produced the most visually appealing results, the ramekins produced the most useful ones. Because of the viscose nature of the strawberry topping, a crust that’s more cup-like (verses more plate-like) makes for tidier serving and eating!

Anyway, pick a vessel, fit with the dough, turning the edges under and crimping to make a decorative edge. Prick the fitted dough with the tines of a fork dipped in flour and bake until golden (the time will vary some depending on the container, but usually between 8 – 12 minutes.) Place the crusts on a cooling rack for 5 minutes and then take them out of their baking containers and allow to cool completely.

While those are doing their thing, prepare the lemon filling. Beat 12 ounces of room temperature cream cheese with 1 Tbsp. of sour cream until smooth. Add ½ c. of granulated sugar, 2 tsp. of lemon zest and 3 Tbsp. of strained lemon juice and beat until smooth (the recipe also adds “fluffy” but mine never fluffed up so I’m not sure what to do with that part.) Divide the cream evenly between the cooled pie crusts. Remember, warm pastry crust + cream filling= soup.  Really. Although I’m not the most patient of bakers, I do adhere to that one cardinal rule.

Once the crusts are filled with lemony-deliciousness, put them in a deep dish, cover the dish with plastic wrap and refrigerate them until ready to serve. Reportedly they’ll stay happy in the refrigerator up to 24 hours.

Three hours or so before service, start on the strawberry topping. I made the strawberry topping the day before. During the following 24 hours or so that they were hanging out together, the sugar really went to town on the strawberries and the result was very liquid-y (delicious to be sure, but very runny.) Time the strawberries accordingly.

Process 1 ½ cups of hulled strawberries in a food processor or blender until smooth; strain and pour into a 3 qt. saucepan. Add 1 cup of granulated sugar. Stir.  As a side note( to any strawberry daiquiri fans out there) this strawberry-sugar mixture would make a divine base for a strawberry daiquiri. So much attention is paid to eating seasonally, but, in my opinion, not enough to drinking seasonally! We should all take time to the toast the seasons more often (with, or without, the addition of alcohol.)

Anyway, back to the dessert. In a small bowl, whisk together 2 Tbsp. cornstarch and ¼ c. of water and slowly add it to the strawberry-sugar mixture. Bring to a boil over medium heat and cook, stirring constantly for about a minute.  Remove from heat and mix in 1 Tbsp. of butter. Allow to cool for 15 minutes.  

Meanwhile, wash and hull ten cups of strawberries- or so the recipe says. I don’t know what on Earth one is supposed to do with ten cups of strawberries. I ended up using about 8 cups and I had plenty left over. Of course that’s not really a problem at my house. Leftover strawberry topping goes really well with left over cream- a delicious problem to be faced with! So, 8- 10 cups of strawberries. Cut some in half or quarters, leave the smaller ones whole. Mix the fresh strawberries gently with the cooled strawberry- cornstarch mixture and refrigerate until cool.


Just before serving, top each pastry crust with ½ cup of the strawberry topping and a dollop of Chantilly cream (or store-bought whipped topping), sit back, and enjoy!


I happen to love strawberries so I piled  them on! 


Thursday, May 29, 2014

Strawberry and Rhubarb Tartlets

PROJECT PATISSERIE:  Adventure #13

Rhubarb and strawberries go together like peanut butter and jelly, peas and carrots, Bonnie and Clyde. Having an allergy to either of these fruits (and I know people who do) would be as tragic to me as being allergic to chocolate. Rhubarb and strawberries are among the first fruits of spring and come as harbingers of hope, announcing to the world that the winter is finally over! That’s a message I know a lot of North Country folks are only too happy to hear!

If, dear reader, you find yourself on the fence regarding the general awesomeness of rhubarb, or perhaps have never considered the superiority of this fruit, maybe these little factoids will help to win you over. 

In descending order…

Cool Rhubarb Factoid #4: Rhubarb has been used medicinally in China as far back as 2700 B.C. to heal all manner of ills including the treatment of burns and as an astringent.  How often can something make an awesome pie and an equally lovely facial treatment?

Cool Rhubarb Factoid #3:  Rhubarb’s leaves are poisonous, which is probably why rhubarb is only sold in stores and farmers’ markets without its leaves (the stalks are perfectly edible though, just to be clear.)

Cool Rhubarb Factoid #2: If, dear reader, you have been irritated by my continual use of the word “fruit” throughout this piece to describe what appears to be a vegetable, you are not alone. In 1947 there was actually a lawsuit filed in New York State arguing over the classification of rhubarb. Lawyers spent hours and hours fighting over whether rhubarb was really a fruit or a vegetable. In case you’re wondering, New York ruled that it is indeed a fruit, which makes the U.S. one of the few countries in the world that doesn’t consider this sweet-tart stalk to be a vegetable.

And, obscure factoid #1: rhubarb should be held in higher general regard if, for no other reason, than because the words “rhubarb, rhubarb” were reputedly used in early British theatre and radio dramas to simulate the effects of unintelligible background conversation. ( Be sure to use that as a conversation starter at a BBQ this summer!)

The end of rhubarb season overlaps with the beginning of strawberry season is probably what birthed this classic combination. When talking about strawberry and rhubarb, the most obvious recipe is the strawberry rhubarb pie- that delicious early summer staple. But I thought that maybe this week we would take the road less traveled…

When I was home for Mother’s Day, I raided my mom’s Southern Living stack and found a recipe for this strawberry rhubarb tartlet in the May 2014 issue. Immediately capturing my imagination, the tartlets were my contribution to last Sunday’s family gathering and this week’s Project Patisserie recipe.

The finished pastry looks a lot like a fancy pants toaster pastry, although I must stop short of actually dubbing it that as I admittedly didn’t try putting one in a toaster. While they’re not as time- or labor intensive as some French pastry recipes, they do require a little bit of work and some resting time. I guarantee that the results are worth it, though. They were well received by my crew and I had no problem finding volunteers to split the few left over tartlets with.

STRAWBERRY RHUBARB TARTLETS
(recipe courtesy of Southern Living magazine)

I used a food processor (as it’s a bit faster) but feel free to adapt this recipe to the traditional hands-and-a-mixing-bowl method for the dough- either works!

Pulse 2 ½ c. of flour with ¼ c. sugar, ¼ tsp. salt, and ¼ tsp. of baking powder. Add 1 c. of cold butter cut into small pieces, and pulse a few times until the mixture resembles a coarse meal.  Stir together 2 large egg yolks with ½ c. of ice water. With the food processor running, pour the yolk-water mixture through the food chute and process until the mixture forms a ball and pulls away from the sides of the bowl.  Wrap the dough in plastic wrap and chill for 1 hour.

Meanwhile, melt 3 T. of unsalted butter over medium heat. Add ½ c. of sliced rhubarb and sauté for 3 minutes. Stir in 1 c. sliced strawberries and 2/3 c. of granulated sugar. Cook, stirring constantly, while crushing the fruit with the mixing spoon for about 5 minutes.

In a small bowl make a rue by mixing together 1 T. of flour and 2 T. of fresh lemon juice until smooth. Pour the rue into the rhubarb-strawberry mixture and bring to a boil. Cook, stirring often, until it thickens (about 2 minutes.) Transfer the mixture to a small bowl, cover with plastic wrap and refrigerate for about 30 minutes. This is the filling for the tartlets.  In my experience, I only ended up needing about half of it for the tartlets. Don’t throw the rest out! Make a double batch of the dough and use it for more tartlets- I promise you won’t have any trouble finding people to take them off your hands. I ended up mixing the leftover filling into vanilla pudding that I made later that day, but it would also be delicious drizzled over vanilla ice cream or cheesecake, or on crepes, or with your morning pancakes, or as a cake filling. 
You get the idea!

By now, the dough should be thoroughly chilled. Pre-heat the oven to 350 degrees Fahrenheit. Unwrap the dough and roll it out on a floured surface to a thickness of about 1/8”. The recipe says to cut the dough into rectangles using a 2 ½ x 3 inch cookie cutter- I don’t happen to have a rectangular cookie cutter and I couldn’t find one locally so I used a fluted pie cutter and a ruler and just measured out 2 ½ x 3 inch rectangles. If you don’t have the patience for all of that, just use a large round cookie cutter-  the finished tartlets will be slightly reminiscent of ravioli, but who doesn’t love ravioli? Especially strawberry-rhubarb filled pastry ravioli?

Place half of the pastry cutouts on a parchment-lined baking sheet, spaced about 2 inches apart and top each with about 1 T. of filling. Brush the edges of the dough with a bit of water and top with the remaining dough cut outs.  Press around the edges to seal.


Stir together 1 large egg and 2 T. of milk and brush the tops of the tartlets with the mixture. Cut a small “x” in the top of each tartlet for the steam to escape and bake them for 30-35 minutes, or until golden. Transfer to a wire rack and cool.  These guys are delicious warm, just as good at room temperature, and maybe even better cold -you can really taste the butter when they’ve been chilled which plays well with the sweet-tartness of the filling.

Strawberry-rhubarb tartlets- so, so good!

Friday, May 23, 2014

What a Peach! : A Vintage Dessert

PROJECT PATISSERIE: Adventure #12

My friend Julie (a born and raised LaFargevill-ian) married a wonderful man named Nate on May 3rd. The couple had a small, private ceremony: in attendance were only the bride and groom’s immediate family members; the bride wore yellow.  No frills, no expensive cakes, or elaborate invitations. Personal and authentic, to paraphrase Frank Sinatra, Julie did it her way. In a world that is not always so joy-filled or happy, I think it behooves us to celebrate, whenever we can, things that are.

Julie comes from really good, salt-of-the-earth kind of people. So when her friends got together with the newly-minted couple this weekend to celebrate their marriage, the meal was inspired by her, and her country roots. The menu headliners were fried chicken, biscuits, gravy, hot potato salad (a kind of potato gratin, really), and green bean casserole. Julie furnished the homemade honeywine, I tended to my favorite course- dessert. No country-style meal would be complete without pie- buttermilk, this time, and, as a special treat, a little thing called Peach Delight.

The recipe for Peach Delight did not come from the Amish, or one of my fancy pants cookbooks, or the inter-web, even. In line with the theme of the event, it actually came from an old country antique store that I used to frequent B.B. (before babies.) I found the recipe, framed and sandwiched under a piece of glass, a few years ago and it’s been hanging on my dining room wall ever since.

Peach Delight is super easy to make, the prep time is very short, and it bakes quickly. Unlike its French and Italian brethren, there’s no waiting involved, no fancy flavors that need time to get to know each other before the dessert tastes its best.  It’s a friendly, come-as-you-are kind of dessert. It can be eaten very shortly after it comes out of the oven while still warm, but it’s also very good cold. It’s excellent with vanilla ice cream or Chantilly cream. My most favorite aspect, though, is that the recipe specifies the use of canned peaches.

While grocery store canned peaches are just fine, I choose to believe that the author specifically meant “canned” as in “put up.” I imagine the woman who put this recipe to paper was thinking about the kind of peaches that someone like Julie’s mama would can in her kitchen, using glass mason jars and her big enamelware kettle, full of all the love and care associated with everything homemade.

Peach Delight

The recipe reminds me of my grandmother. When asked for a recipe, she would happily share it but always with approximate measurements. When pressed for more exact measurements, she would say “Oh, just enough.” Because the recipe didn’t specify, I used a teaspoon for most of the measurements here and I was happy with the results. But don’t be bound by the teaspoon! I’ve never had a dessert that suffered from too much cinnamon or butter…

Preheat oven to 425 degrees Fahrenheit. Put large canned peach halves and a little canning liquid in a muffin pan (I used single serving ramekins for easier service.) Fill the center of each peach half with about a teaspoon of brown sugar, a small piece of butter, and two drops of vanilla. Sprinkle the tops with cinnamon, and top with a tablespoon of drop biscuit dough (recipe below). Bake about 15 minutes or until the biscuits are golden brown.

This is the drop dough recipe that I used, but I think any good drop dough biscuit recipe will work. Sift together 2 c of flour, 4 tsp. baking powder, ½ tsp of cream of tartar, ½ tsp salt, and 2 T. sugar. Cut in ½ c, of butter or vegetable shortening until the mixture resembles a course meal. Slowly pour in 2/3 c. of milk. Add one beaten egg and stir well. The dough is now ready to use for the Peach Delight. There will be dough leftover, so either double the Peach Delight recipe, or portion and drop the remaining dough on a cookie sheet and bake at 450 for 10-15 minutes.


A little plain right out of the oven but imagine
 it with a dollop of Chantilly cream or a scoop of
 vanilla ice cream!


P.S. - Regarding last week’s Mud Hen Bars: I learned that there is a saying in the South that refers to something unsightly as being “uglier than a Mud Hen.” While no one seems to know for sure, I feel that that may be the key to last week’s mystery: the connection between the waterfowl (the Mud Hen) and the dessert (Mud Hen Bars.) Either way, it still seems more likely than my theory of a baker/ornithologist with a penchant for the American Coot marsh bird!

Wednesday, May 14, 2014

What's a Hen Got to do With It? : The Mud Hen Bar

PROJECT PATISSERIE: Adventure #11

What’s a Hen Got to do With It: The Mud Hen Bar

“What in creation is a mud hen?” That’s what I was asking myself when I came across the Mud Hen Bar recipe in my Amish cookbook. The funny thing about Amish cookbooks is that there’s not a picture to be found in them so (to paraphrase a certain California Representative) I had to bake it in order to find out.

We have a flock of chickens at home. I’ve seen them in all conditions- including very muddy, but they never reminded me of a dessert. I’ve also heard of mud puppies, which I mistakenly thought was Southern vernacular for an alligator (it’s apparently a salamander) - but a mud hen?

Never one to give up on the pursuit of useless knowledge, I turned to the internet. It turns out that there is such a thing as a Mud Hen- it’s apparently the common name for the American Coot, a water bird that looks a bit like a duck crossbred with a chicken. If you’re having trouble visualizing such a creature, dear readers, imagine a duck’s head on a chicken’s body, but with smoother feathers- that’s a Mud Hen. One photograph did show the American Coot as having a brown and white coloring. Mud Hen Bars are brown and white- so maybe that’s the connection?

It turns out Mud Hen Bars (we’re talking about the dessert now, not a place where the American Coots congregate over beer) are a Southern dessert. I got very excited because the American Coot is found in parts of the South, but then I kept reading and learned that they are also quite common as far north as British Columbia. Finding myself at a loss, I formed this hypothesis: a Southern baker/ ornithologist with a penchant for the American Coot named a dessert after it- that’s my shot in the dark. Alas, this may just be one culinary mystery that will have to be left unsolved.

Culinary enigmas aside, I recall introducing friends and family to this dessert at a recent party as Mud Hen Bars, or Muddy Hens, or some variation thereof. My family must have been equally puzzled by the name as they very quickly became known as the “ooey-gooey bars” probably thanks to the marshmallows.

These are quick and very easy to make. While they look like a gooey mess, and they are a bit gooey, the funny thing about these guys is that, after being refrigerated, they taste like brownies. It’s the darndest thing and quite fitting for a dessert with such mysterious origins to have an equally mysterious taste.

A word of warning: these are very sweet. In addition to the chocolate, marshmallows, and then the brown sugar used in the meringue topping, the recipe calls for an additional cup of sugar for the batter. On the next go round I think I’ll try to scale back on the sugar in the batter and see if the results aren’t better.

The Mud Hen Bar (a.k.a. The Ooey-Gooey Bar) Recipe

Preheat the oven to 350 degrees Fahrenheit. Mix together ½ c. of melted butter and 1 c. of sugar. Beat in one whole egg and two eggs yolks (save the whites.) Add 1 ½ c. flour, 1 tsp. baking powder,  ¼ tsp. salt, and 1 tsp. vanilla.  Mix thoroughly and the spread the mixture in a greased 9 x 13 pan. 

Scatter 1 c. of semi-sweet chocolate chips and 1 c. of miniature marshmallows over the batter.


In a clean bowl, beat the two left-over egg whites until stiff peaks form, and then slowly add 1 c. of brown sugar. Beat just until incorporated. Spread this over the chocolate chips and marshmallows. Bake for 30-40 minutes or until golden brown. Cool and cut into squares. 


The Mud Hen
                                          
                                                    ...and the Mud Hen. Does anyone get the reference?

Wednesday, May 7, 2014

Chocolate Mocha Pie

PROJECT PATISSERIE: Adventure #10

Last week I waxed poetic about my new Amish cookbook- given the book’s immense pie section I thought I’d linger there just a little bit longer. Next week I promise to move on, but I found something in there that I couldn’t pass up: Chocolate Mocha pie.

The chocolate mocha pie was our contribution to my in-laws’ Kentucky Derby party last weekend. I can hear the collective shouting the obvious: “Derby Pie!” Yes, nothing would have been more apropos for a Kentucky Derby Party than a Derby Pie and the suggestion itself was echoed by a few party goers. I guess I could try to play it off as an intentional choice, pretend that I was just being too cool for school (or theme parties) or blame it on my contrary nature- “Rebel Without a Cause” in a frilly kitchen apron. What’s closer to the truth, though, is that I was more of a “Baker Without a Clue.” I vaguely recall hearing about Derby Pie in passing, I think, but really it just didn’t register. The only thing I can say in my defense is that I have a one-track mind when it comes to desserts and, as it so often is, that track was focused squarely on chocolate.

Out of curiosity I did look into Derby Pie. Derby Pie is served every year at the Kentucky Derby and is comprised of pie crust, chocolate, walnuts, and a bit of Kentucky bourbon. Although I’m not a fan of high-octane desserts, I am a sucker for tradition and I have a soft spot in my heart for the good people of Kentucky, so I may just have to pencil Derby Pie in for next year!

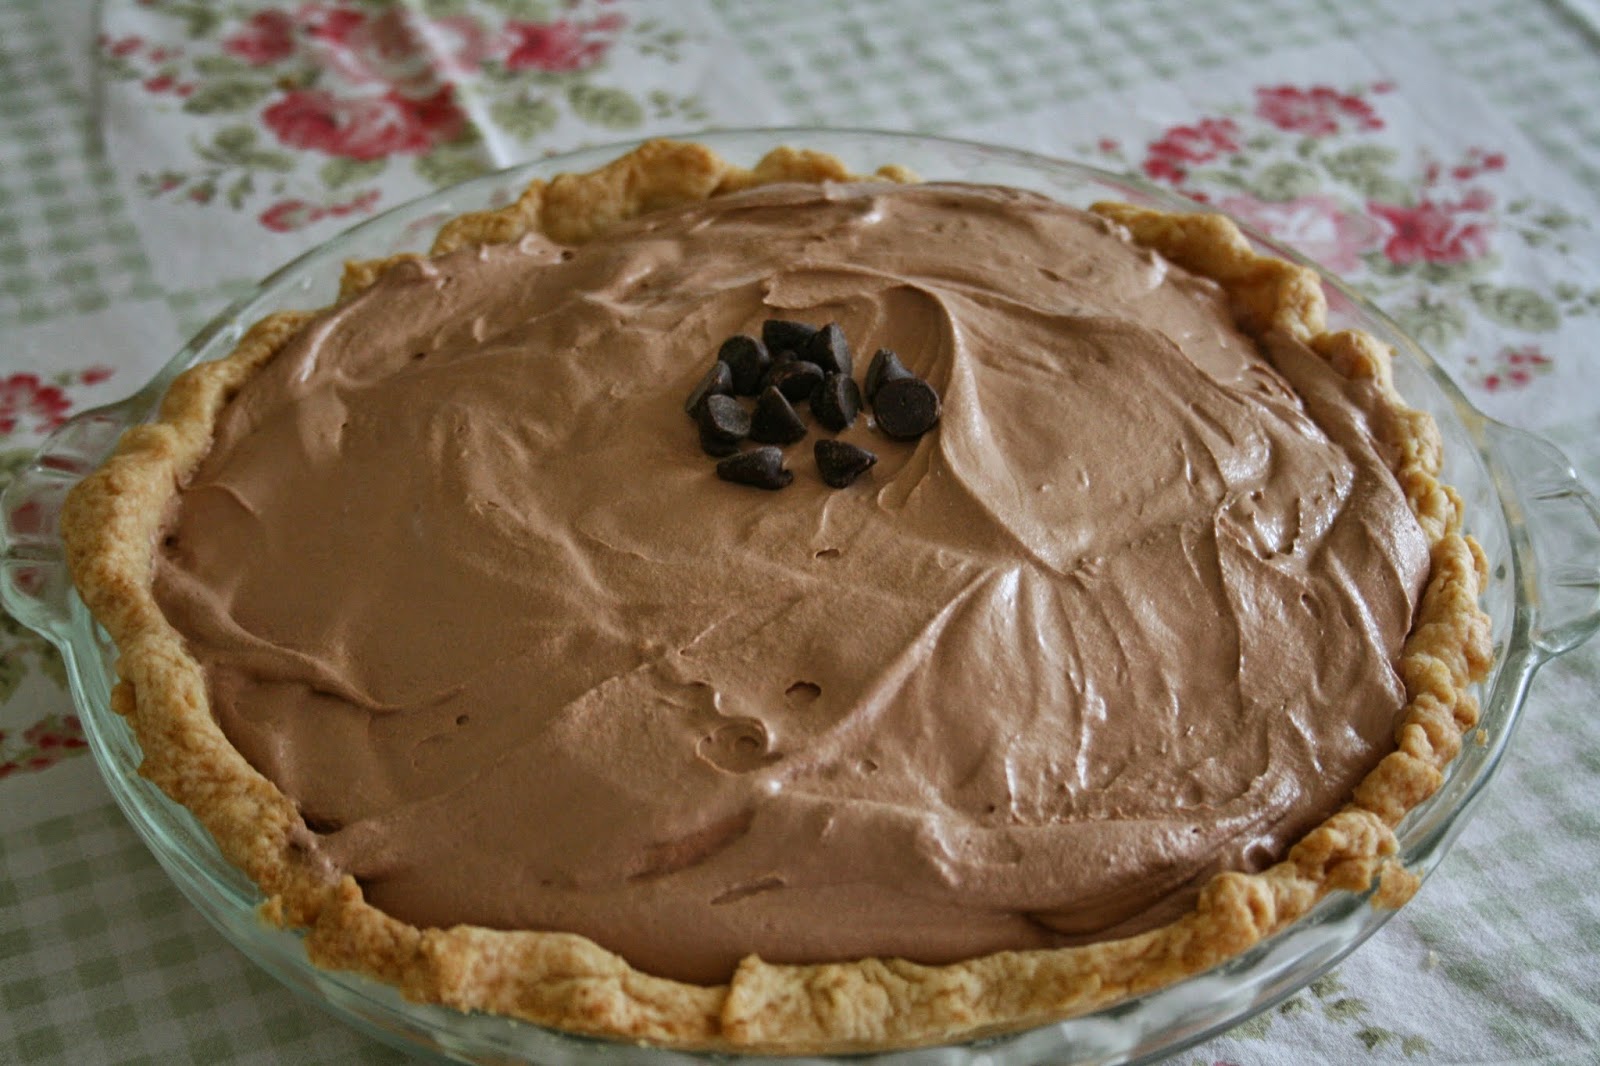
But back to the matter at hand. “Chocolate mocha pie” is a bit of a misnomer, as it does not contain any coffee or coffee flavoring. My best guess is that the mocha reference comes into play from the color of the filling which could, indeed, be best described as mocha-colored. Its ingredients are simple and straightforward: homemade flaky pie crust (the foundation of any delicious pie!), melted chocolate, cream cheese, and Cool Whip. That’s pretty much it. OK- and a little bit of sugar and some milk, but that’s really all.
It’s as easy as pie to make (what pie article would be complete without that reference?) and so delicious. Something about the subtle hint of cream cheese mixed with chocolate and the lightness of the whipped topping was heavenly.  It was almost like a chocolate cream cheese mousse.

As delicious as it is, the real test of any dessert is what happens with the uneaten portions. Typically my mother-in-law encourages us to take some food home so that she won’t be saddled with quite so many leftovers. The funny thing is that last weekend my in-laws were only too happy to relieve me of the remaining slices of pie- and because I love them, and homemade pie is all about love, I was only too happy to let them have it.


Homemade Pie Crust 
(so good and well worth the extra effort)

If, dear reader, you missed the opportunity to make the homemade crust last week, here it is again. Just in case- the only difference is that this week’s pie crust needs to be pre-baked.

Sift together 1 1/3 c. of all-purpose flour, 1 Tbsp. sugar, and ¼ tsp. of salt into a large mixing bowl. Cut 5 Tbsp. of cold unsalted butter and 3 Tbsp. cold vegetable shortening into the flour mixture until the mixture forms large, coarse crumbs the size of peas. Drizzle 4 Tbsp. of ice water over the mixture and toss with a fork until the dough is evenly moist and starts to come together into a mass but does not form a ball.

Transfer the dough to a work surface dusted with a bit of flour and shape it into a 6 inch disk; wrap it tightly, and refrigerate for 1 hour.

When chilled, unwrap the dough and return it to the dusted work surface. Sprinkle the top of the dough with a little extra flour (not too much, just enough to keep the rolling pin from sticking to it) and roll it out into a 12 inch round, lifting and turning the dough several times during the process to keep it from sticking to the board. If it starts to stick, loosen it with a bench scraper.

Line the pie plate/tin with the dough, taking care not to stretch it. Once lined, trim the edge of the dough, leaving a ¾ inch overhang, and tuck the overhang under itself to create a high edge on the pan rim. Using your index finger and thumb, pinch the dough around the rim to form a fluted edge or other decorative finish.  Put it in the freezer for 30 minutes and pre-heat the oven to 400 degrees Fahrenheit.

Line the frozen crust with a piece of heavy aluminum foil. Fill the foil-lined crust with dried beans, or pie weights. Bake the crust until it dries out- about 15 minutes. Once dried, remove the foil and weights from the crust and reduce the oven temperature to 350 degrees Fahrenheit.  Bake the crust until golden brown, about 10 minutes longer. Transfer the crust to a wire rack to cool. NOTE: Let the crust cool completely before adding the filling- warm pie crust has a habit of liquefying most whipped fillings.


The Filling


Melt 8 ounces of semi-sweet Baker’s chocolate with ¼ c. of milk over low heat, stirring constantly. Beat in 8 ounces of softened cream cheese, ½ c. of sugar, and another ¼ c. of milk. Let cool and then carefully fold in 3 ½ c. of Cool Whip.  For those who don’t like Cool Whip (I’ll begrudgingly concede to the possibility!) Chantilly cream or just plain old whipped cream could be substituted- in theory, anyway. Cool Whip’s whipped texture is stabilized during the manufacturing process, whereas the only thing keeping Chantilly cream and whipped cream light and fluffy is air- so not terribly stable. The next time I make this recipe (which I hope will be very soon) I’ll play around with these substitutions and report back!


Wednesday, April 30, 2014

The Not So Humble Pie: Cream Cheese Pecan

PROJECT PATISSERIE: Adventure #9


Pie is an American icon- right up there with George Washington and baseball and the Statue of Liberty.  Pie crust is to me what a blank canvas is to a painter: it represents possibility and creativity, hemmed in only by the limits of one’s imagination.

Over breakfast I was thinking about what dessert to make for this weekend’s big family dinner and pie quickly became a strong contender. I recently bought an Amish cookbook at a local country store. What caught my attention were the dessert sections, and specifically the pie section, which had no fewer than 75 recipes alone!  All the traditional staples were represented- apple, blueberry, pecan, and custard pies- with more than a few that I’d never heard of- including Rice Crispie ice cream pie, chocolate mocha pie, and oatmeal pie. I bet that some of these Amish ladies would certainly understand the pie crust- blank canvas analogy!

Eventually my morning musings went from Amish pies to the sad state of pies in this country. What our mass culture- with its penchant for “fast” and “convenient” – has done to pies is downright criminal! The once lovingly homemade pie crust filled with fresh fruit, that wholesome pie of yore, has been replaced by store-bought dough filled with canned fruit in a gelatinous mixture perhaps better suited for a science laboratory than a dinner table. It’s awful.

Philosophical musings aside, let’s get back to the issue at hand.  There seems to be a rumor circulating that pie crust is difficult and time consuming to make. I am here to attest otherwise. In the amount of time that it will take to run to the store, purchase pre-made pie crust, and unthaw it, you can, dear reader, have a beautiful homemade pie crust for a fraction of the cost.


While perusing the Amish cookbook’s pie section, the Cream Cheese Pecan pie caught my attention; it sounded like a cheesecake base with a praline topping- yum. In the end, the Cream Cheese Pecan pie was very sweet and maybe a bit too wet for my liking, but I’ll still take a homemade pie over a factory made one any day of the week. After all, pie is an exercise in love, in wholesomeness, and in all things homemade, and handmade. 

Cream Cheese Pecan Pie

Crust (I urge all bakers to try a homemade crust at least once!)

Sift together 1 1/3 c. of all-purpose flour, 1 Tbsp. sugar, and ¼ tsp. of salt into a large mixing bowl. Cut 5 Tbsp. of cold unsalted butter and 3 Tbsp. cold vegetable shortening into the flour mixture until the mixture forms large, coarse crumbs the size of peas. Drizzle 4 Tbsp. of ice water over the mixture and toss with a fork until the dough is evenly moist and starts to come together into a mass but does not form a ball.

Transfer the dough to a work surface dusted with a bit of flour and shape it into a 6 inch disk; wrap it tightly, and refrigerate for 1 hour.

When chilled, unwrap the dough and return it to the dusted work surface. Sprinkle the top of the dough with a little extra flour (not too much, just enough to keep the rolling pin from sticking to it) and roll it out into a 12 inch round, lifting and turning the dough several times during the process to keep it from sticking to the board. If it starts to stick, loosen it with a bench scraper.

Line the pie plate/tin with the dough, taking care not to stretch it. Once lined, trim the edge of the dough, leaving a ¾ inch overhang, and tuck the overhang under itself to create a high edge on the pan rim. Using your index finger and thumb, pinch the dough around the rim to form a fluted edge or other decorative finish.  Put it in the freezer for 30 minutes and pre-heat the oven to 375 degrees Fahrenheit.

The filling:

Mix together 8 ounces of softened cream cheese, ½ c. of sugar, 1 beaten egg, and ½ tsp of vanilla extract.  Spread this on the bottom of the unbaked pie shell.  Top with 1 c. of chopped pecans.


Mix 3 eggs, ¼ cup of sugar, 1 tsp of vanilla extract, and 1 cup of light corn syrup. (Yes, I know- the irony does not escape me that I spent the better part of this article ranting against processed pie and pie ingredients and here I am listing corn syrup as an ingredient! ) If I ever make this again I will use ½ cup as the full cup made the filling very wet.  Beat until smooth and pour over the pecan/cream cheese layer. Bake for 35-40 minutes or until golden brown.

Cream Cheese Pecan Pie

Wednesday, April 23, 2014

Chocolate Beer Cupcakes: Happiness with Icing on Top

PROJECT PATISSERIE: Adventure #8


The recipe for chocolate beer cake caught my attention a few weeks ago when I was cruising through my French Patisserie cookbook.  I was looking for a birthday cake for my daughter and the chocolate beer cake gave me pause. Chocolate and beer and cake? It’s like the universe took the three things that my husband, my daughter, and I each love the most and combined them into one cosmic dessert. While I didn’t end up using it for the birthday cake ( I’m sure I’d get the “Mother of the Year” Award for serving a three year old beer cake!) I was on the lookout for the next possible opportunity to make it.
Right on cue I got the call that we’d be gathering at my sister-in-law’s for Easter dinner- would I bring a dessert? Absolutely. Chocolate beer cake was calling my name! 

I looked over the recipe, did an ingredient check, added whatever else I needed to that week’s grocery list, and off to the store I went. The recipe called for Stella Artois- a fancy pants Belgian lager. When I rolled up to the beer aisle I balked at the price of Stella and I figured the lager that we had at home would be just fine. I’ll gladly spend $29.95 on two pounds of French gourmet chocolate but don’t ask me to shell out $15 for a 6 pack! Priorities, I guess.
Easter Sunday was going to be pretty busy so I got up early that morning to get a head start on the cupcakes. I started the oven and shuffled over to the pantry to gather the ingredients. Everything was there- except the beer… its absence punctuated by the empty bottles in the recycling bin. This was starting to look like an episode of I Love Lucy: my husband drank my star ingredient!

So there I was at 6:45 in the morning on Easter Sunday trying to track down a bottle of beer.  A challenge indeed with all the stores closed for the holiday. After a few frantic texts to a nearby friend went unanswered (somehow he must have managed to still be asleep despite having a young baby at home) my sainted husband set out to procure me some beer. He came home a few minutes later with a Coors Light- a far cry, as any beer aficionado will tell you, from Stella Artois but all that he could find in my father-in-law’s garage. Beggars can’t be choosers, I guess.
Between the proverbial rock (the Coors Light) and a hard place (showing up to my sister-in-law’s empty handed) I popped the top on the beer and away we went.

The recipe is unbelievable easy and goes fairly quickly. In less than a half hour I had 12 beautiful cupcakes cooling on the rack. When they cooled they tasted amazing- very moist and light- just lovely.
I frosted them about 20 minutes before we were due to leave the house with  whipped chocolate ganache and garnished the whole thing with a pretzel- a natural companion to both beer and chocolate. The ganache was a little grainy- in my haste to leave the house I must not have completely melted the chocolate. When everything was assembled - cake, frosting, and pretzel- something was off- and I can’t pinpoint what it was. There was a bitterness to it- and I’m not sure who the culprit was; maybe the 72% dark chocolate I used in the cake batter, or maybe the taste of the beer finally came through, or perhaps the chocolate I used for the frosting was too dark?

The mystery will remain unsolved until I make it again- next time with a “Do Not Drink” note taped to the beer!

Chocolate Beer Cupcakes: Recipe
Pre-heat the oven to 350 degrees Fahrenheit. While it’s warming, put one stick of SALTED butter and ½ cup of lager in a sauce pan and heat over low heat until the butter has melted. The recipe suggests using Stella Artois or some other variety of tasty, fancy lager. While I’m sure Coors Light is a charming beer, save it for a hot summer day on the river, not this chocolate cake recipe.

Sift together 1 cup of self-rising flour, 1/3 cup of cocoa powder, and ½ teaspoon of baking soda in a bowl.  Add 2/3 cup of sugar, 1/3 cup of milk, 1 beaten egg, 1 teaspoon of vanilla extract,  1 ½ ounces of dark chocolate, and the beer-butter mixture.

Beer-butter?  Does anyone else think that sounds pretty good? Imagine it on freshly baked bread…
Either spray a muffin tin with baking spray or line it with cupcake liners and fill each about ¾ full. If cupcake aren’t your thing- the thought is astonishing, but possible- this recipe can also be prepared as a loaf: line a 2 pound loaf pan with parchment paper or spray it with baking spray and fill with the batter.

For chefs going the cupcake route: bake them for about 15 minutes or until a toothpick inserted in the center comes out clean. For those choosing the loaf route: bake for approximately 50 minutes or until the loaf passes the toothpick test. In either case, the top of the cake should bounce back slightly when prodded.

The recipe I used suggests serving the loaf/cupcakes warm and topped with a chocolate sauce. The other option is to allow them to cool completely and then frost them with whatever you want. I used whipped chocolate ganache, but they’d also be amazing with butter cream icing if you feel like taking the time.

Whipped chocolate ganache:
In a double boiler (or a glass bowl set in a pan of simmering water) melt 1 cup of semi-sweet chocolate in ½ cup of whipping cream over low heat. Stir until smooth.  Take the bowl off the heat and let it cool to room temperature.  Using an electric mixer (I used a stand mixer because this may take a bit) whisk until the mixture gets thick and shiny and no longer drips from the whisk. Frost the cupcakes immediately as the ganache will begin to harden if you let it sit and will be difficult to spread.


Tuesday, April 15, 2014

Ru-ga-what? Rugelach.

PROJECT PATISSERIE: Adventure #7
 
When it comes to cookies, besides the traditional chocolate-chip-walnut variety that I pledge my undying love to, my favorite would have to be rugelach. My friend Trin introduced me to rugelach a few years ago- she bakes them every year for Christmas and gives boxes of them away as presents. I must sheepishly admit that I always promptly devour mine- it’s kind of embarrassing, really, to confess to such gluttony- but hers are really, really good. For the uninitiated, rugelach are Jewish pastries originating from Central and Eastern Europe made from a cream cheese-based dough. The dough is turned out, cut into triangles, topped with something delicious (in the case of this week’s project- crushed walnuts, cinnamon, and sugar) and then rolled to form tiny croissant-looking cookie-pastries.
The word on the street is that the cream cheese component to the dough is a relatively new American innovation, and that traditional rugelach dough was made with sour cream or leavened with yeast. I haven’t had either of the traditional varieties but I imagine that they would be just as delicious as the cream cheese assortment. Besides walnuts, other common fillings include raisins, chocolate, ground poppy seeds, or fruit preserves. The recipe I used called for apricots and brandy in addition to the walnuts, but as I never got on board the alcohol-infused pastry train, I skipped that part; I blame my abstention on my grandmother.

My Slovakian maternal grandmother was a master baker. If anybody in her village needed a cake for a birthday, anniversary, or wedding they went to her- the woman could do amazing things with butter, flour, eggs, and sugar. That being said I’m not sure if it was a cultural propensity or just her own taste, but the majority of her cake recipes seemed to also include at least a half bottle of rum or brandy. Whenever I visited her as a child I remember that she always offered me cake or homemade pastries. While her cakes were beautiful and innocuous looking enough, taking a bite was akin to taking a shot of rum. I won’t even venture into the child welfare aspect of that. I guess her generation didn’t worry about stuff like that. My grandmother grew up in crippling poverty, survived a Nazi occupation, lived through World War II, and a subsequent Soviet invasion, so what was a little rum? As a consequence of her high-octane cakes, I came to believe early on that the addition of hard liquor just ruined perfectly good desserts and as a general rule I skip it in my baking. Alas, I am not pastry fascist, however. I acknowledge that there are lots of good, brandy-loving folks out there like my grandmother who like the pairing so I’m including it.
While I can’t comment on the culinary advantages or drawbacks of using the brandy and apricots, I can offer that some of the best rugelach I’ve eaten has had a decidedly more cream-cheesy tasting dough. This dough was delicious, and if I had never tasted my friend’s rugelach I wouldn’t think anything was amiss, but I admit that I would have liked some more cream cheese flavor. Next time I’ll make it a point to play with the cream cheese to butter ratio and see where it takes me.

Rugelach Recipe:
You can make these the same day, but the dough needs to rest for a total of about 2 ½ hours so give yourself a bit of lead time.
In a food processor, process 2 sticks of cold, unsalted, cubed butter, 8 ounces of softened cream cheese, 3 Tbsps of sugar, and a ¼ tsp of salt. Add 2 c. of all-purpose flour and pulse together until a dough forms.  Divide the dough in half, flatten into disks, and wrap them tightly in plastic wrap. Refrigerate the dough for 2 hours. While whiling away the time, clean the food processor bowl and blade.

For all the brandy-lovers out there, this is for you! In a small pot, bring 1 cup of dried apricots, ¼ c. of brandy, ½ tsp cinnamon, and ½ cup of water to a boil. Reduce the heat and let simmer until most of the liquid is absorbed (approximately 7 minutes.) Transfer the mixture to the newly cleaned food processor and pulse it a few times until it’s finely chopped. Stir in 1 c. of finely chopped walnuts and 2/3 c. of sugar.

If passing on the brandy and apricots, mix the 1 c. of finely chopped walnuts with the ½ tsp. of cinnamon and 2/3 c. of sugar. Continue on as if nothing happened. 
Once the dough is nicely chilled, roll out one dough disk at a time on a floured surface to form a 12 inch round.  Spread half of the filling on the dough, leaving a 1 inch border all around. Cut the dough into 16 wedges. I found that this was a fun alternative use for a pizza cutter, although of course a regular kitchen knife will do just fine. Starting from the outside edge, tightly roll each wedge until you reach the tip. Place the rugelach tip side down on a parchment lined baking sheet. Lightly beat an egg and add a splash of milk or cream. Brush the tops of the rugelach with the egg-milk mixture and put the sheet in the freezer for 30 minutes.

Place oven racks in the lower and upper third of the oven and preheat to 325 Fahrenheit. Bake for 30-35 minutes, or until golden brown. I’m usually squeamish about baking two pans at the same time as I think the hot air circulation is impeded a bit by the second baking sheet but I didn’t have any trouble with these guys. Just be sure to swap the position of the baking sheets (so, the lower sheet to the upper position and vice versa) about half way through baking. Transfer to wire racks and cool completely. They will keep in airtight containers for up to 1 week.

  Rugelach, fresh from the oven.
 
A fancy-pants culinary type shot of the finished
cookie-cum-pastry.

Wednesday, April 9, 2014

Plum Pithiviers


PROJECT PATISSERIE: Adventure #6

I read somewhere that there is a particular species of fly that only lives for 24 hours- the poster child for the old adage “life is short.” However brief their existence is, those flies have about 23 hours and 50 minutes on the Plum Pithiviers that I made for this week’s project.  The pastries would have had an even shorter lifespan if I hadn’t kept my family at bay with a wooden mixing spoon until I captured an acceptable photograph of them.
Pithiviers are simple French pastries. A “simple French pastry” sounds like a bit of an oxymoron, I know, but there’s not much to them at all. A layer of puff pastry dough, topped with a bit of frangipane, then a dollop of plum compote, then more frangipane, and sealed with another round of dough. That’s it.

The discerning reader probably caught the “puff pastry dough” part. Yes, I did sneak that in there. The Pithivier recipe I used, courtesy of British pastry chef Will Torrent, gives the option of using store bought puff pastry dough if you really don’t feel up to the challenge of making it homemade.  It’s totally up to the chef- no judgment here.

While the process of making the Pithivier is fairly straightforward, I made some basic mistakes that turned the whole thing into a bit of a circus. It started out well. I cheerfully rolled out the puff pastry dough, cut out the dough rounds with my brand new biscuit cutters, set out the chilled frangipane and plum compote; everything was ready to assemble. I was optimistic- I had this under control. Things were rolling right along until it came time to seal the filling in the dough and throw the pastries in the oven. Because puff pastry dough is essentially just butter with a little bit of flour holding it together, it gets soft and runny if handled too much. In addition, my kitchen was quite warm on account of two ovens running. Long story short, the dough didn’t seal well and the filling began to spill out of the Pithiviers onto my baking sheet.

Will Torrent’s ears must have been burning at that point. I had some choice words for him, his recipe, and my own stupidity for trusting a chef from the land of offal and blood puddings to make a French dessert- all of this while trying desperately to save these pastries. Luckily the kids were in bed.
I finally realized that handling them anymore was hurting rather than helping the situation and exasperated, I threw them in the oven.  After thinking that there’s no possible way it could get any worse- it got worse. I checked on them about ten minutes into their baking time and to my horror the Pithiviers looked like they had been run over by a truck- and then backed over again. Although the dough was rising, the filling had oozed everywhere and the poor things looked lopsided and absolutely disemboweled- it was like something out of a pastry horror movie. What did Alexandre Dumas say? Something about waiting and hoping? I waited for the timer to ring, took a deep breath, and assessed the situation.

In the end I decided that the best course of action was to allow the Pithiviers to cool slightly and then cut around the carnage. This cleaned up the pastries and gave them back some semblance of their intended biscuit-like shapes.
Alas, this story has a happy ending. While they were perhaps not the beauty queens I had hoped they would be, the Pithiviers were amazingly delicious- so much so that the thought of how much butter I was consuming didn’t even faze me. That’s what a good dessert is- so divine that one doesn’t even give a thought to its dietary consequences. As much as anybody hates to admit fault, it turns out that my trouble with the recipe was more operator error than the recipe itself. I owe Mr. Torrent an apology, and maybe a nice thank you note for sharing the recipe for such a blissful dessert.

Pithivier Recipe

Pre-heat the oven to 425 Fahrenheit and line a baking sheet with parchment paper.
For the frangipane: Beat 6 ½ tbsp. of softened unsalted butter and ½ cup of sugar in a bowl with an electric mixer on high speed until creamy (up to 4 minutes.) Add 3 eggs- one at a time, beating until well mixed. Fold in 1 cup of ground almonds- also known as almond flour- with a large spoon until well incorporated.  Put the frangipane in the refrigerator until you’re ready to use it. It will keep in the refrigerator for a few days if stored in an airtight container.

For the filling: Pit and chop two fresh plums into bite-sized pieces.  Place the plums and ½ cup of plum jam into a small saucepan. Over medium heat, warm them until the plums begin to break down a bit. Don’t cook them too much though, as the texture of the plums adds a lot to the finished pastry. Allow the mixture to cool completely before using it- remember that the puff pastry dough is essentially butter and the consistency of the dough will start doing funny things if warm compote is added to it.

A note on the plums: I suppose that it would be conceivable to use canned plums if there aren’t any fresh ones on hand. I did find, however, that the tartness of fresh plums when mixed with the sweetness of the plum jam was worth the effort of trying to find fresh plums in April.

The dough: roll out 13 ounces of thawed puff pastry dough (store bought is fine) to about 1/3 inch thick. Stamp out 4-6 rounds of dough using a 4 inch biscuit or cookie cutter. Stamp out the same amount of dough using a 5 inch cutter.
I know that the rounds look funny right now and the chef may be wondering why on earth one needs to be so much bigger than the other- I will share what I learned by not following Mr. Torrent’s directions. It turns out that the 5” dough round is so much larger because it will be used to top off the pastry. As the filling is quite tall, the top dough portion needs to be large enough to cover the filling AND comfortably touch the dough on the bottom in order to seal everything in properly- all the while not compressing the filling too much. While pure speculation, if someone were to disregard that piece of advice and make the top piece of dough too small, the filling may well ooze out of the center of the pastry and make a mess all over the baking sheet.

On the 4 inch rounds, spoon or pipe a bit frangipane in the center, leaving a ½ border around the edge. Make sure to reserve half of the frangipane for later.  Add a teaspoon-sized dollop of cooled plum compote on top of the frangipane, and top with another bit of frangipane. Then, place the large 5”in pastry round on top. Seal the whole kitten-caboodle by pressing the dough edges together with the tines of a fork dipped in flour. If at any point the dough starts to become a bit runny, put it back in the refrigerator for a few minutes- this will help the dough regain its composure.
If moved by the fancy-pants inclination, take a very sharp paring knife and score curved lines on the top of the Pithivier.  Start from the middle and extend the lines out to the edge like the rays of the sun - you know, that bright thing in the sky that the North Country hasn’t hair or hide of since October!

Beat one egg slightly and add a splash of milk. Brush the egg wash on the tops of the Pithiviers and bake them in the oven for 20 minutes. When they’ve baked allow them to cool slightly on the pan. If necessary, the edges can be cleaned up a bit by using a biscuit cutter to cut off any excess- a nice tip that helped to revive my Pithiviers.  Carefully lift them off of the baking sheet with a spatula and place them on a cooling rack to cool completely.
These pastries are delicious fresh but they’re also very good after they’ve been refrigerated as the dough becomes a bit more dense and slightly less yielding. The consensus at my house was that the Pithiviers would also be great served with a little dollop of whipped cream and/or topped with any remaining plum compote.


Although not a beauty queen, this pastry definitely delivers
on flavor!

Wednesday, April 2, 2014

A Czech Lesson

PROJECT PATISSERIE: Adventure #5


I love fancy-pants pastry. It’s true. But sometimes I just want to put down the crème brulee torch and make something rustic and comforting without the use of swanky kitchen gadgets or complicated components. Unlike the past few projects, the only thing an extra set of hands is needed for this week is to help eat the finished pastries. Maybe it’s a shot in the dark but I’m guessing volunteers to help eat pastries are far more numerous that those willing to risk third degree burns to help mix molten sugar into whipped egg whites!
When learning a new language, most people want to know how to say the expletives first- and the Czechs do have some colorful ones. While the first Czech word my husband ever learned was “beer” (the expletives came second), let this be your first Czech word: “kolac,” pronounced “koh-lah-tch.”

A kolac is a round, traditional Czechoslovak peasant pastry made from delectably moist dough. It’s versatile in that the dough is very lightly sweetened so it lends itself nicely to sweet or savory fillings. Dessert kolace (the plural of “kolac” and pronounced koh-la-tch-eh) are typically filled with a fruit butter of some kind- plum butter is common- but ground poppy seeds, walnut paste, or the exceedingly delicious cream cheese and farmer’s cheese fillings are also widely enjoyed. As if that weren’t delicious enough, the pastries are then finished off with a sprinkle of streusel topping- a perfect companion to a cup of coffee.

The word “kolac” is Czech for “awesome.” Ok, not really, but it ought to be because that’s what they are. I feel so strongly about this that I think I may write to the Czech President Milos Zeman and suggest the change.
Regarding the recipe, allow me to preface what I’m about to say with this: the secretive Free Masons have nothing on a baker with a good recipe. We’re famous for being reticent or even downright evasive when asked to share it. If pressed, some of us may even alter it before giving it away. Case in point: my husband’s grandmother made amazing cinnamon rolls that are still a part of the Walldroff Christmas tradition. When her daughters-in-law asked for the recipe she happily gave it to them. It was only after she had passed away and everyone got together to make them did the women in the family realize that they all had different recipes!

I suspect that this is the case with this kolac recipe. The woman who I got it from is the daughter of Czech immigrants. She claims that this is her mother’s recipe and how she learned to make kolace while growing up in Texas. It all sounds very legitimate, but while I don’t want to point fingers, something’s up.

The recipe calls for an amazing 5 to 6 cups of flour, plus two whole eggs. If I were to use this recipe again, I would cut the flour down to half and substitute two egg yolks for the 2 whole eggs, as I suspect that in addition to the heaping mountain of flour, the egg whites were a contributing factor to the dryness of the dough. In the end though, while they’re not authentic Czech kolace, they’re not bad. Whatever their shortcomings, they certainly didn’t stop me from eating way too many of them in the name of research!

Kolac recipe:
Unlike previous recipes, these can be made the day that you’d like to serve them. They also freeze well.
In a small bowl combine 1 ½  tablespoons of active dry yeast, 1 tablespoon sugar, 2 tablespoons flour, and 3 tablespoons warm milk (about 110-120 degrees Fahrenheit.) Cover with a clean dish towel and set in a warm location for 10 minutes.
While those ingredients are doing their thing, combine 1 cup of warm milk, 2 eggs -or for the intrepid baker just the egg yolks, 1/2 cup melted butter, 1 teaspoon of vanilla extract, the same amount of salt, and ½ cup of sugar. Mix them together and blend in the yeast mixture.
Measure out 5-6 cups of flour and slowly start mixing it a cup at a time into the ingredients in the bowl. As previously noted I only added about 2-3 cups. After the third cup the dough was getting quite hard and yelling “mercy!” so I stopped trying to force feed it more flour.
The chef is then directed to place the whole kitten-caboodle on a lightly floured work surface and knead by hand until no longer sticky. The problem with this step is that by this point the dough was not sticky at all, too dense to knead, and almost too hard to properly rise. Next time, I’ll place the milk-egg-butter-vanilla-salt-sugar-yeast mixture on a lightly floured work surface and knead in- instead of mix in- 2-3 cups of flour. This will give me more control over the consistency of the dough. Not to beat a dead horse over this flour thing, but keep in mind that the dough was tough after only 3 cups of flour. 5-6 cups would have made the dough akin to a little boulder.

Once the dough is ready, place it in a clean bowl, dust the top with flour, cover with a dish towel and let it rise in a warm location for about an hour.

After the hour has elapsed, punch down the dough and divide it into 32 pieces. Roll them into balls and flatten. Place the flattened dough on a lightly greased cookie sheet, cover with a dish towel and let it rise 30-45 minutes.
While waiting on the dough, start on the filling. I’m including the recipe for the cream cheese filling, though it’s just one of a myriad of possibilities. Combine 16 ounces of softened cream cheese with 2 egg yolks, ½ cup of sugar, and 1 teaspoon of vanilla. Mix until smooth.
In addition to the filling, traditional kolace also have a streusel topping called a “posypka” [poh-sip-kah]. This is made by combining ½ cup of sugar, ¼ cup of flour, 1 tablespoon of melted butter and scrunching (an official culinary term) them together with your fingers until the mixture resembles a dry meal.
After the 30-45 minutes have lapsed, flatten the centers of the dough with the bottom of a drinking glass dipped in flour- this will form a nice little depression for the filling. Whisk one egg and brush the rims of the dough with it. Fill the depression with the cream cheese filling- either by using a pastry bag with a plain tip, a ziplock bag with the corner clipped off, or a butter knife. Sprinkle the top of each filled kolac with the posypka topping.
While the oven is preheating to 350 degrees Fahrenheit, let the kolace rest another 10-15 minutes. Bake for 10-15 minutes, cool, and enjoy!

Kolace remind me of my grandmother, our summer cottage in
Moravia, and all things Czech!